Step 4: Determine Auto Launch
Back to TutorialWhat to Auto Launch?
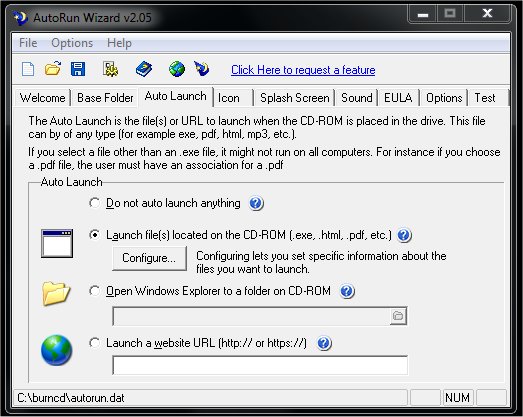
The AutoLaunch area of AutoRun Wizard is the most powerful part of the software. This is where you determine what you want to have run when your USB disk or CD-ROM is placed into the computer. You have many different options when choosing what to Auto Launch. For our tutorial we are going to launch an HTML file. If you wish to see what other options we offer for Auto Launch, please see our USB disk or CD Auto Launch Feature section.
Auto Launch an HTML file
From the Auto Launch tab you select the option to Launch a File located on the USB disk or CD-ROM. This will enable the CONFIGURE... button that allows you to specify options for the File you want to launch.

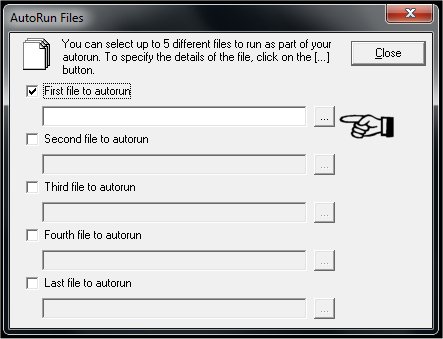
Autorun Files
This screen you can select multiple files to autorun. For our tutorial we are only going to autorun one HTML file. Simply check the box to enable the First file to autorun selection. Then click on the [...] icon to the right (arrow is pointing to it) to change the properties of the first file we are going to autorun.

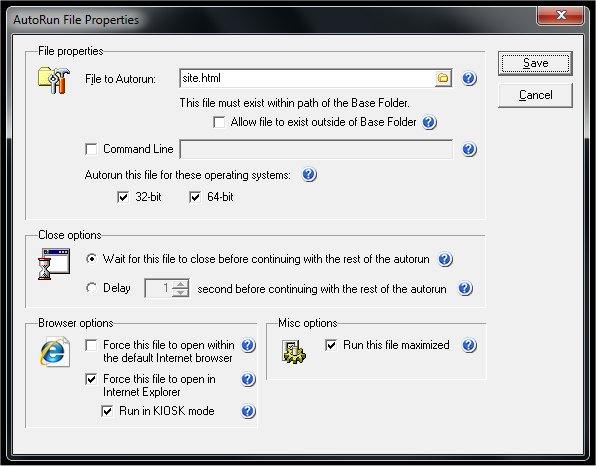
Configure the File you want to launch
From here we select which file to autorun. Choose the folder icon and select the HTML file you want to autorun. Leave all other options at the defaults and move down to the Browser Options section. Here you can force your HTML file to be opened in Internet Explorer in KIOS mode (no menu's, full screen, etc). Otherwise you can pick to force you file to open in the users default internet browser.
If you would like more details on the other options we are not using in this tutorial, please see our CD Auto Launch Features.

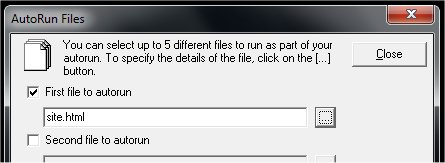
After specifying the properties of your autorun file, click Save to return back to the list of files to autorun. Your screen should look like this.

From here we can click close to continue on creating the custom attributes of our autorun.
Next Step